Contents:
- Why Subfloor Repair and Waterproofing Matter More in Florida
- A Short History of Subfloor Practices (And Why Old Homes Need Extra Attention)
- Key Aspects of Subfloor Repair
- Assessing Structural Damage
- Replacing and Reinforcing Damaged Sections
- Leveling and Flatness Standards
- Waterproofing: The Step Most Installers Rush
- Vapor Barriers and Moisture Testing
- Waterproofing Membranes and Moisture Barriers
- Ventilation and Long-Term Moisture Management
- Expert Insight: What a Seasoned Flooring Crew Actually Checks
- The Eco-Friendly Angle: Sustainable Subfloor Prep
- Practical Application: What Homeowners Should Expect Step by Step
- Signs Your Subfloor Needs Attention Before You Even Call a Contractor
- Frequently Asked Questions
- How long does subfloor repair and waterproofing take before hardwood installation can begin?
- Can hardwood be installed over a slightly damp subfloor if I use a moisture barrier?
- Is subfloor waterproofing necessary in every room, or just bathrooms and kitchens?
- How much does subfloor repair typically cost in the Tampa Bay area?
- Will subfloor repair delay my overall flooring project significantly?
Pull back an old plank of hardwood in a Tampa Bay bungalow and you’ll usually smell it before you see it: a faint mustiness, like a damp towel left too long in a gym bag. Sometimes there’s a dark ring staining the subfloor where water pooled years ago, quietly rotting the wood from underneath while the finished floor above looked flawless. This is the part of a flooring project nobody photographs for Instagram, yet it decides whether that beautiful new hardwood lasts twenty-five years or buckles within eighteen months.
Subfloor repair and waterproofing are the unglamorous groundwork behind every successful hardwood installation, especially in a humid, storm-prone market like Tampa Bay. Skip this step, or rush it, and even the finest engineered oak from a premium mill will cup, gap, or delaminate. This guide walks through what actually needs to happen beneath your feet before a single hardwood board goes down, and why the crew doing that prep work matters just as much as the flooring itself.
Quick Answer: Before hardwood installation, subfloors need three things: structural soundness (no rot, sag, or squeaks), a moisture reading under 12% for wood subfloors (or under 4.5 lbs/1000 sq ft/24 hrs for concrete slabs via calcium chloride test), and a flat surface within 3/16 inch over a 10-foot span. In Florida’s humid, flood-prone climate, subfloor repair and waterproofing typically run $3–$12 per square foot depending on damage severity, and skipping this step is the single most common cause of hardwood failure within the first two years.
Why Subfloor Repair and Waterproofing Matter More in Florida
Hardwood is hygroscopic, meaning it absorbs and releases moisture depending on its environment. A slab in Ohio might see seasonal humidity swings of 20-30%. A slab in Tampa can swing from 45% relative humidity in a dry January to over 85% during a July afternoon storm. That volatility is why subfloor moisture control isn’t optional here the way it might be treated as a formality elsewhere.
Add in the region’s flood history, high water tables, and a housing stock that includes plenty of homes built before modern vapor barrier codes existed, and you’ve got a recipe for hidden subfloor damage. Hurricane Idalia’s storm surge in 2023 pushed water into ground-floor living spaces across parts of Pinellas and Hillsborough counties, and a lot of that water sat under flooring for days before anyone noticed. Mold doesn’t wait for a permit.
A Short History of Subfloor Practices (And Why Old Homes Need Extra Attention)
Subfloor construction has changed dramatically over the past century, and knowing what era your home was built in tells you a lot about what’s likely hiding underneath your existing floor.
Homes built before the 1960s in Florida often used plank subfloors — individual boards nailed directly to joists, sometimes with gaps that let air (and moisture) move freely. This actually helped with ventilation but did nothing for waterproofing. By the 1970s and 80s, plywood and later OSB (oriented strand board) became standard, offering a flatter, more consistent surface but far less forgiving when exposed to standing water; OSB in particular swells and loses structural integrity fast once saturated.
Slab-on-grade construction, common across much of Tampa Bay since the mid-20th century, introduced a different set of problems entirely. Concrete is porous. Even a slab that looks bone dry can be wicking moisture up from the ground below through capillary action, a phenomenon called moisture vapor emission. Without a vapor barrier — often missing or degraded in homes built before the 1990s — that moisture has nowhere to go except up into whatever flooring sits on top.
Key Aspects of Subfloor Repair
Assessing Structural Damage
The first step is always inspection, not guesswork. A proper assessment involves walking the entire floor to identify soft spots, checking joists from below (through a crawlspace or basement access where available), and probing any area with visible staining or a musty smell. Rot compromises wood fiber long before it becomes visible from above, so a screwdriver test — gently pressing into suspect wood — often reveals soft, spongy material that looks completely normal from the top.
Common culprits behind structural subfloor damage in this region include long-term plumbing leaks under bathrooms and kitchens, HVAC condensation lines that were never properly sloped, roof leaks that traveled along joists before showing up as ceiling stains, and, of course, storm flooding. Some contractors will patch over a stain without ever pulling up the material to check how far the damage extends, which almost always means the rot resurfaces within a year or two, usually after the new flooring is already installed on top of it.
Replacing and Reinforcing Damaged Sections
Once damage is mapped, the repair itself typically means cutting out compromised plywood or OSB back to solid, dry material and sistering new joists alongside any that have lost structural capacity. Sistering involves bolting a new length of lumber directly against the damaged joist rather than replacing it entirely, which is usually faster and less invasive when the joist itself hasn’t fully failed.
New subfloor material should match or exceed the original in thickness — usually 3/4-inch tongue-and-groove plywood for residential applications — and needs to be fastened with screws rather than nails wherever possible, since screws resist the popping and squeaking that develops as humidity cycles cause wood to expand and contract.
Leveling and Flatness Standards
Hardwood manufacturers are specific about flatness tolerances for good reason: a subfloor that’s out of level by more than 3/16 inch over a 10-foot radius (or 1/8 inch within 6 feet, depending on the manufacturer’s warranty terms) creates stress points where boards will eventually creak, gap, or crack at the seams. Self-leveling compound gets poured over concrete slabs to correct minor dips, while plywood shimming or sanding handles high and low spots on wood-framed floors.
This step gets skipped more often than any other in the entire process, mostly because it’s invisible once the finished floor goes down and doesn’t show problems immediately. The consequences show up eighteen months later as a hollow-sounding board or a visible seam line, by which point the homeowner is looking at a much more expensive fix than a $200 bag of leveling compound would have been.
Waterproofing: The Step Most Installers Rush
Vapor Barriers and Moisture Testing
Before any waterproofing membrane goes down, the subfloor needs to be tested, not eyeballed. Two tests dominate the industry: the calcium chloride test, which measures moisture vapor emission rate over a 60-to-72-hour period on concrete, and relative humidity (RH) probes drilled into the slab, which give a faster and generally more accurate reading of internal moisture conditions. For wood subfloors, a pin-type or pinless moisture meter checks the wood’s moisture content directly, with readings above 12-14% signaling a problem that needs to be resolved before installation proceeds.
A concrete slab reading above 4.5 lbs/1000 sq ft/24 hrs on the calcium chloride test, or above 75% RH, generally calls for a moisture mitigation system before hardwood goes down. In much of Florida, given ambient humidity levels and older slab construction without vapor retarders underneath, this test result comes back elevated more often than homeowners expect.
Waterproofing Membranes and Moisture Barriers
Where moisture testing flags a concern, a liquid-applied or sheet membrane moisture barrier gets installed directly over the subfloor before the hardwood or underlayment goes down. These epoxy-based or urethane systems create a vapor-impermeable layer that blocks moisture migration from below without trapping it in a way that causes other issues.
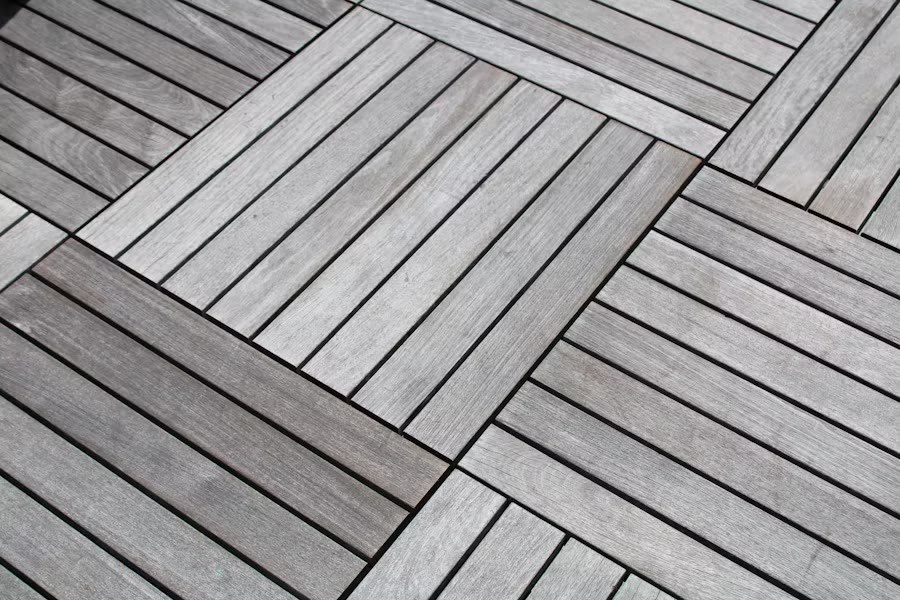
This matters most in specific rooms. Anywhere water is used directly — kitchens, laundry rooms, and especially bathrooms — deserves particular attention, and this is where shower waterproofing becomes its own specialized discipline entirely, separate from general subfloor prep but following the same core logic: seal first, finish second. A shower pan that isn’t properly waterproofed will eventually leak into the surrounding subfloor no matter how nice the hardwood installed nearby looks.
Ventilation and Long-Term Moisture Management
Waterproofing isn’t just about membranes and sealants; it also means making sure moisture has somewhere to go once it’s controlled. Crawlspace vents that have been painted shut, HVAC systems that are undersized for the home’s square footage, and bathroom exhaust fans that vent into the attic instead of outside all contribute to chronic humidity problems that no amount of subfloor prep can fully offset. Part of a thorough pre-installation assessment includes checking these systems, not just the floor itself.
Expert Insight: What a Seasoned Flooring Crew Actually Checks
After installing hardwood across hundreds of homes throughout Pinellas, Hillsborough, and Pasco counties, the team at https://tampabayfloors.us/ has developed a pre-installation checklist that goes well beyond what a lot of national flooring chains bother with. Every job starts with a moisture reading, not a visual inspection, because the two frequently disagree — a subfloor that looks perfectly dry can still read at 16% moisture content, well above the threshold where hardwood installation should proceed.
One thing that sets an experienced local crew apart from a general contractor picking up flooring as a side service: familiarity with how specific neighborhoods and housing eras behave. A 1960s block home in Seminole Heights with a slab foundation presents an entirely different moisture profile than a 1990s wood-framed home in New Tampa built on a raised foundation. Tampa Bay Floors approaches each differently rather than applying a one-size-fits-all prep process, because the underlying risk factors genuinely aren’t the same. That kind of pattern recognition only comes from doing this work, in this specific climate, for years.
The company’s process also documents moisture readings and subfloor condition with photos before covering anything up, which protects homeowners if a warranty question comes up two or three years down the line. It’s a small operational detail, but it reflects an approach built around getting the underlying prep right rather than rushing to the visible, sellable part of the job.
The Eco-Friendly Angle: Sustainable Subfloor Prep
Subfloor repair and waterproofing aren’t just about protecting an investment; done thoughtfully, they also reduce environmental impact. A hardwood floor that fails prematurely because of undetected moisture doesn’t just cost the homeowner money twice — it sends salvageable lumber to a landfill and requires manufacturing, transporting, and installing an entirely new floor’s worth of material. Getting the subfloor right the first time is, in a very direct sense, the most sustainable choice available.
Beyond longevity, the materials used in modern subfloor repair have gotten meaningfully greener. Low-VOC moisture barrier membranes and adhesives are now standard offerings from most major manufacturers, reducing off-gassing in a home’s air supply during and after installation. Reclaimed or FSC-certified plywood is increasingly available for subfloor patching, and repairing damaged sections rather than tearing out and replacing an entire subfloor — when structurally viable — cuts down on construction waste considerably. A crew that sisters a joist instead of ripping out an entire floor system isn’t just saving the homeowner money; it’s keeping a substantial amount of lumber out of the waste stream.
There’s also a water-conservation angle that’s easy to overlook: proper waterproofing at the subfloor level prevents the kind of chronic leaks that waste hundreds of gallons of water over months before anyone notices a slow drip has been running under the flooring. Catching that during a subfloor waterproofing assessment, rather than after mold has set in, is a small but real contribution to resource efficiency.
Practical Application: What Homeowners Should Expect Step by Step
- Initial inspection and moisture testing. A contractor should test moisture content in multiple locations, not just one spot near the door, and document baseline readings before any work begins. This typically takes one to two hours depending on square footage.
- Damage mapping. Any soft spots, staining, or structural concerns get identified and, where possible, verified from below via crawlspace or basement access. Expect this to reveal at least some minor issues even in homes with no obvious flooring problems, particularly around plumbing penetrations.
- Repair or replacement. Damaged subfloor material gets cut out and replaced; compromised joists get sistered or reinforced. For a typical 1,500-square-foot home with moderate damage in one or two rooms, this phase runs two to four days.
- Waterproofing membrane application, where indicated. Based on moisture test results, a vapor barrier or waterproofing membrane gets applied and given proper cure time — often 24 to 48 hours depending on the product — before the next phase begins.
- Leveling. Self-leveling compound or shimming corrects any remaining flatness issues, followed by a final moisture and flatness check before hardwood installation actually starts.
- Acclimation. Hardwood should sit in the installation space for at least 3 to 5 days, allowing the wood to adjust to the home’s ambient humidity before it’s nailed or glued down. Skipping this step, even with a perfect subfloor underneath, invites gapping later.
Total cost for subfloor repair and waterproofing varies widely based on damage extent. Minor moisture mitigation with membrane application might run $2-4 per square foot. Sections requiring joist replacement or extensive rot remediation can run $8-15 per square foot in affected areas. It’s worth budgeting for the possibility of surprises — a contractor who quotes a flat, suspiciously low number for subfloor work sight-unseen is often planning to skip the testing and inspection phase entirely, which tends to surface as an expensive change order mid-project.
Signs Your Subfloor Needs Attention Before You Even Call a Contractor
A few warning signs are worth watching for even before scheduling an inspection: floors that feel spongy or bounce slightly underfoot, persistent musty odors that don’t resolve with normal cleaning, visible staining on ceilings below a bathroom or kitchen, doors that have started sticking (sometimes a sign of structural movement), and existing hardwood that’s cupping — where board edges rise higher than the centers, a classic symptom of excess moisture from below.
None of these guarantee major subfloor damage on their own, but any one of them justifies a proper moisture assessment before committing to a new hardwood installation. Catching a problem at the inspection stage costs a fraction of what it costs to catch it after $12,000 worth of hardwood has already been installed on top of it.
Frequently Asked Questions
How long does subfloor repair and waterproofing take before hardwood installation can begin?
For a single room with moderate moisture issues, expect three to five days including testing, repair, membrane application, and cure time. Whole-home projects with multiple damaged areas can take one to two weeks before hardwood installation is ready to start. Rushing cure times on waterproofing membranes is one of the most common reasons floors fail early.
Can hardwood be installed over a slightly damp subfloor if I use a moisture barrier?
A moisture barrier reduces risk but doesn’t eliminate the need for acceptable baseline readings. Most manufacturers still specify maximum moisture content thresholds even with a barrier in place, and installing over consistently wet conditions — rather than an occasional seasonal spike — usually means there’s an unaddressed source, like a leak, that needs fixing first rather than covering up.
Is subfloor waterproofing necessary in every room, or just bathrooms and kitchens?
Wet areas need the most aggressive waterproofing, particularly around showers, but general moisture vapor barriers are typically recommended across an entire slab or subfloor system in Florida, given the region’s humidity and flood risk. Treating only the “obvious” rooms while ignoring a living room slab with elevated moisture vapor emission is a common gap that shows up later as cupping in an unexpected area.
How much does subfloor repair typically cost in the Tampa Bay area?
Costs generally range from $3 to $12 per square foot depending on the extent of damage, with minor moisture mitigation on the lower end and structural joist replacement or extensive rot remediation on the higher end. Getting a detailed, itemized quote after a proper inspection — rather than a flat estimate given without testing — is the best way to avoid surprises mid-project.

Will subfloor repair delay my overall flooring project significantly?
It adds time upfront, typically several days to two weeks depending on scope, but it prevents a far longer delay down the road: tearing out failed hardwood, re-doing subfloor repair that should have happened the first time, and reinstalling flooring, which can take a month or more once mold remediation and insurance claims enter the picture.